TILLER CULTIVATOR MAINTENANCE
THE MAINTENANCE OF TILLER AND CULTIVATOR
FROM START TO THE USE
You just bought a tiller or cultivator produced by Pubert. Our machines have been designed to be reliable and durable. Like any mechanical system, your machine needs to be maintained regularly in order to enable the best use, the longer possible.
Our distribution network can answer your needs for the maintenance of your material.
STARTING
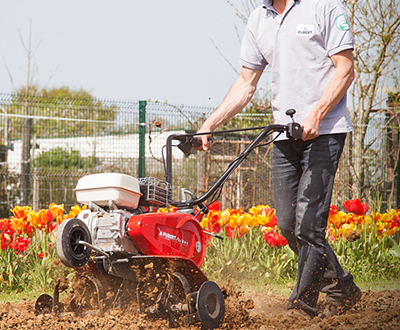
Most of our dealers will have the machine prepared for your immediate use in the garden. If this is not the case, the machine is sold with an operation manual. You will find a chapter on the assembly and the starting. Please follow it rigorously to start in the best conditions. IMPORTANT : Once the machine is assembled, proceed to the oiling of the engine: oil type and quantity are specified in the manual. If the machine has an oil bath filter, see the manual instructions. After these steps, you can fill the fuel tank and start the machine.
SIMPLE ACTIONS TO ENSURE THE LIFETIME OF YOUR MACHINE
A regular and systematic maintenance after each use of your tiller will not take much time and will ensure comfort and security for the next use. For more complex interventions, such as engine, gearbox or transmission, do not hesitate to contact a professional.Cleaning : For better security conditions, wait for the exhaust pipe to cool, then disconnect the spark plug. On the electrical tiller, remove the security key.
Clean the working tools and the inside of the cover. Wear heavy gloves, and use a wood or a plastic tool. Remove all the divots then flush it with water if needed. Do not use high pressure washer. In order to have easier access to this area of the machine, you can have it tilted backward with the handles on the floor. Do not incline it on the side. Remove first the tank of the oil bath filter if there is one. Remove the dust from the rest of the machine with a brush.
AIR FILTER MAINTENANCE
A dirty air filter can cause a difficult starting, a loss of power, a bad functioning and an accelerated wear of the engine. The cleanliness of the air filter must always be guaranteed. Inspect the air filter condition after each use, clean it if needed or at least every 25 hours. Change the filtering element every 200 hours or if it shows some weaknesses.
Several types of air filters exist according to the engine:Foam air filter : Remove the element and clean it with gasoline. Dry it in the sun. Saturate with engine oil, then press firmly to spread evenly the oil and remove the excess. Put it back into its place, respecting the fitting orientation.
Dual-element air filter : Remove the foam filter from the paper filter. Check both elements and replace them if they are damaged. To clean the paper filter, tap the filter on a hard surface many times to eliminate the dirt or blow compressed air (2Bars max) from the inside. Do not use a brush for this operation. To clean the foam element: see previous chapter. Clean the base and plastic cover of the filter. Put all elements back in place.
Oil bath filter : Remove the cover, remove and clean the foam filter (see previous chapter) Remove the tank and empty it in a suitable container. Clean the tank with liquid detergent and water then dry it. Replace all elements and add fresh engine oil SAE 10W30 in the tank of the filter. Filling level is indicated on the tank. Oil draining must be done every 25 hours or once a year. The air filter must be cleaned regularly, even more if the environment is dusty.
For more explanations, see engine instruction manual or contact your dealer.
ENGINE OIL
Level checking : it is important to check the engine oil level before each use. To do so, place the machine on even ground. The engine support must be horizontal. The oil cap is located on the front of the engine, it is also the level gauge. Unscrew the cap, take it out and wipe the gauge. The checking is done by putting the cap at its place without screwing. Read on the gauge the oil level, which must be between the low and high level, inside the hatched area. The level must always be correct. If not, add SAE 10W30 oil for 4-stroke engine.
Draining : The first draining must be done after 10 hours or 1 year, whichever comes first. Then we recommend every 50 hours or 3 years, whichever comes first. For this operation, you must make an appointment at your dealer’s or in a workshop specialized in mechanical garden [...]tools.
CABLES ADJUSTEMENT
The machine has one or more cables, depending on the model (clutching, reverse gear, engine gas adjustment…). They operate the controls. Checking and adjustment are important for the best optimization of the levers action. There is an adjusting bolt on each cable.
Follow the checking and adjustment instructions indicated the manual.
STORAGE
After the last fall job, it is important to respect the instructions in order to start the machine again in the best conditions the following spring.
- Clean completely the machine, remove the tines and check them. Replace them if needed, as a too much worn tine will not work properly and wear the secondary transmission more quickly.
- We recommend to change the complete tines, and not only the blade alone. A too important clearance in the fixing holes of the tines can damage the transmission. Grease the power shaft and tines shaft before replacing them on the machine.
- Check the lower part of the transmission closing flange. If it is worn, you should have it changed before a too important wear damages the transmission.
- Add 20g of lithium based grease in the transmission every 50h or once a year minimum before storage.
- Empty the fuel tank. Let the engine run until it runs out of fuel to drain the whole fuel system. In order to avoid any problem at starting due to the soiling of the carburetor by a deteriorated fuel, you can use a ready for use fuel, available in shops: this alkylated fuel contains less harmful products and avoids the scrubbing of the carburetor.
- Check that every nuts and screws are well tightened.
- The machine must be stored in a dry and ventilated area.


